Artisan Bread
0
(from 0 reviews)
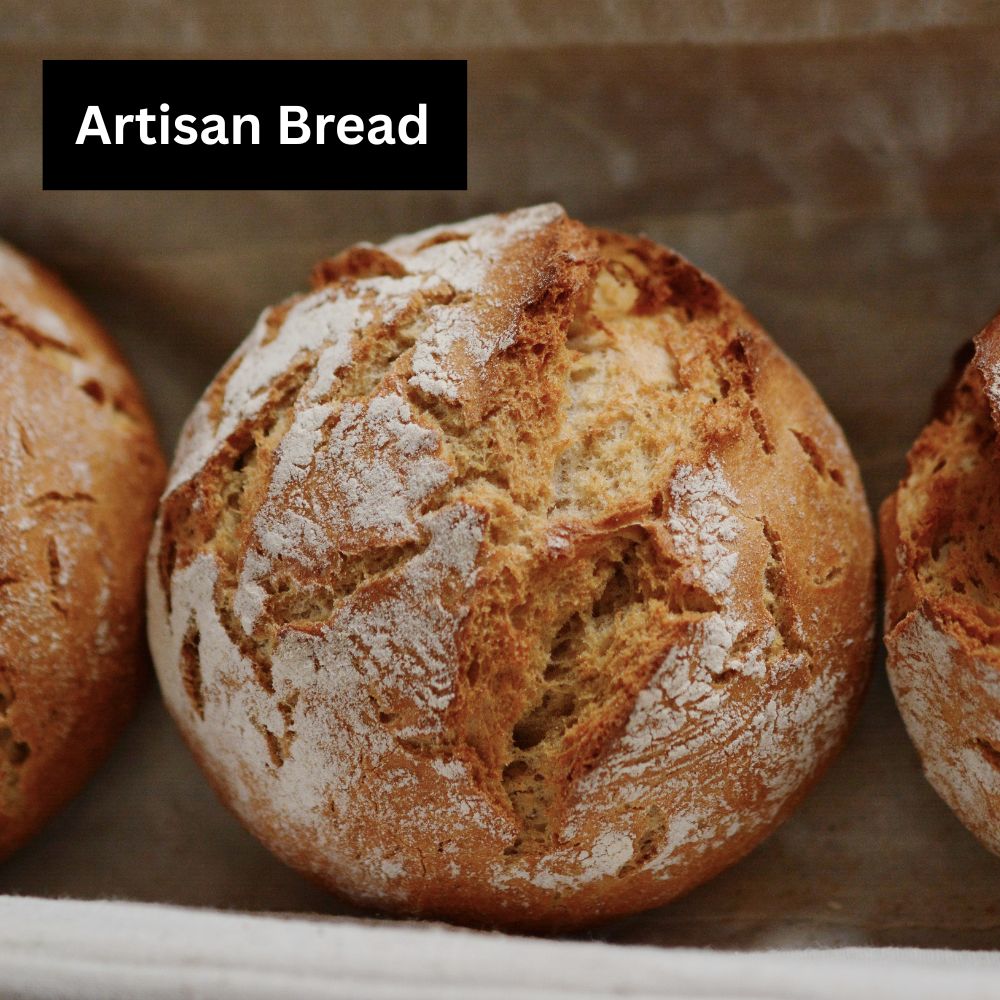
This 3-hour bread has the sourdough aesthetic, without the sourdough work or time commitment! The crust is crispy, with a soft, airy inside.
May 13, 2025
Featured Recipes


Share
Times
Total Time:
3 hours 10 minutes
Wait Time:
2 hours
Prep Time:
20 minutes
Cook Time:
50 minutes
Materials
Standing mixer
Dutch oven (5 to 7-qt)
Food thermometer (optional)
Nutrition
2291
cal
56 g
protein
29 g
fat
409 g
carbs
**Numbers are for total, not per serving
Ingredients
1X serving amount: 1 loaf
Dry
AP flour, 4.5 cups
extra-virgin olive oil, 2 TBSP
sugar, 1 TBSP
active dry yeast, 7 g
warm water, 1.5 cups
Spices
salt, 2 tsp
Produce
Meat, Dairy, & Eggs
greek yogurt, 2 TBSP
Directions
Step 1
In the bowl of a standing mixer, mix:
1 TBSP sugar
7 g active dry yeast
1.5 cups warm water
Mix until well combined. Wait 5-10 minutes for the mixture to form a foam on the top. This will prove the yeast is active.
Note: 7g of active dry yeast would be 2.25 tsp or 1 packet.
Step 2
Now to the same bowl, add:
2 TBSP extra-virgin olive oil
2 tsp salt
2 TBSP greek yogurt
4.5 cups AP flour
With the dough hook attachment, mix until combined.
Note: The dough will be sticky, don't worry about this.
Why Yogurt? Yogurt helps keep the bread moist and soft, but you don't have to add it. The lactic acid in yogurt helps relax gluten, making the bread softer. Yogurt can also add a slight tangy flavor, though not as strong as sourdough.
Step 3
Grease a large bowl with butter or oil. Dump the dough into the bowl. Cover the bowl with plastic wrap or a damp kitchen towel and let the dough double in size (about 1.5 hrs in a warm home).
Step 4
Once the dough has risen, perform a series of coil folds. Flour your hands and insert your hands underneath the bottom center of the dough and lift up gently, then gently lower the dough again. Turn the bowl 90 degrees and repeat.
Now shape the dough by taking the top (12 o'clock) and folding it down to 6 o'clock, leaving an inch from the bottom edge. Then fold the right side to the center and the left side to the center. From the bottom of the dough, roll the dough up gently (don't ruin air in the bread) to form an oval-shapped ball. Place the dough in a bowl lined with parchment paper and cover again.
Tip: You will be using the parchment paper as a sling to lift the bread and lower it into the dutch oven, so make sure it is big enough.
Step 5
While the dough rests again, place the dutch oven (with lid) in the oven and preheat the oven to 445 F. You will most likely have to adjust the oven racks. You want the dutch oven as centered in the oven as possible. For my oven, I put the oven rack on the third notch up from the bottom.
After the oven preheats, let the dutch oven sit inside the preheated oven for at least 30 minutes. After 30 minutes, score the bread (this is the time to make cute designs), then take the dutch oven out. Using the parchment paper as a sling, lift the dough and lower it into the dutch oven. Put two regular sized ice cubes beside the dough (one on each 'side'). Place the lid on the dutch oven and bake for 30 minutes with the lid. After 30 minutes take the lid off, and bake for 20 minutes or longer so a nice crust forms on the bread. When the bread is done, the internal temperature of the bread at the thickest part should be about 195-200 F.
Note: The ice will create steam, which helps the bread rise in the oven.
Step 6
After baking, take the bread out of the dutch oven and place on a cooling rack (if not, the bottom will continue cooking and the crust will be darker and thicker).
Do not cut into the bread until it has cooled completely. Wait at least an hour, if not more. Cutting into the bread too early can result in a gummy loaf.
Storage Tip: I've noticed storing this bread in the fridge will dry it out. I usually leave it out in a plastic tub or bag. If you don't want soggy crust, make sure it completely cools off before putting it in a container!
Share
Featured Recipes
Rate & Comment
Comments
(0)